Migration from 1C: step by step
The migration wizard automatically transfers your data from any existing 1C:Enterprise / BAS configuration (through its standard export) into a Flexbooks database. It needs an EnterpriseData or CommerceML export; a ready mapping template exists for BAS Бухгалтерія, and other configurations may need mapping adjustments. Open it from Administration → Migration from 1C (Міграція з 1С). The migration is run by an administrator (the Administrator profile); details for the administrator are in the administrator guide. For how 1C and Flexbooks terms correspond, see Coming from 1C/BAS.
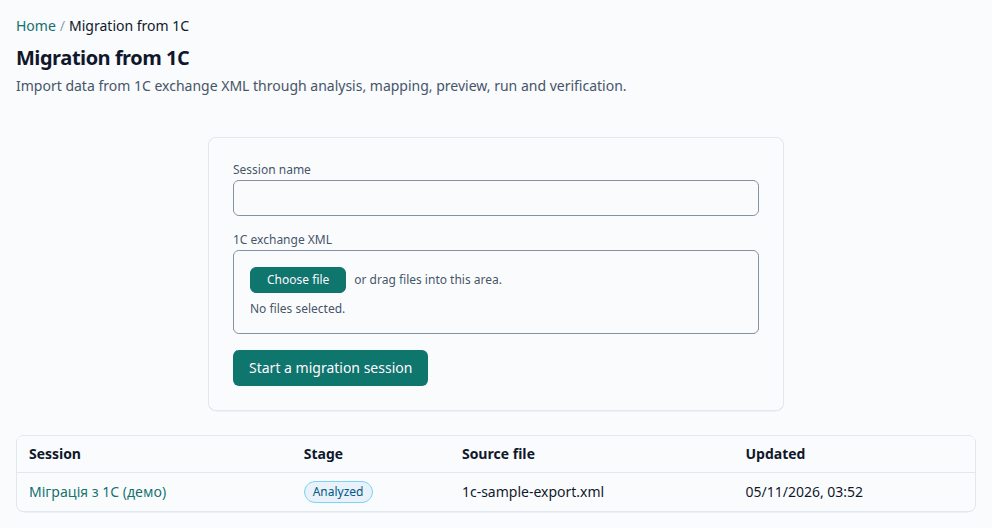
The session list shows each migration and its stage. Create a new session by giving it a name and uploading the 1C export file.
Six-step wizard
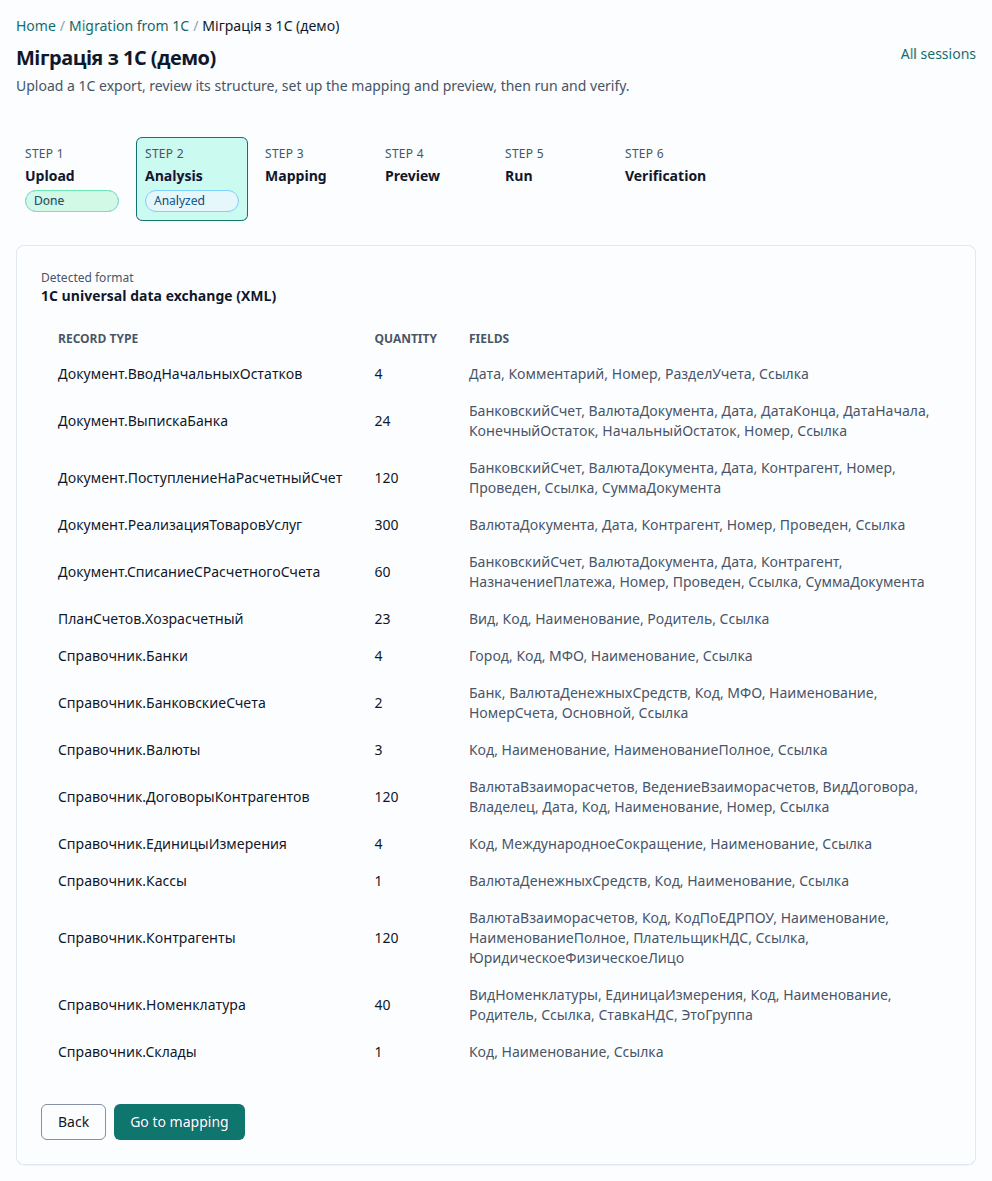
- Upload — upload the 1C export XML file (the 1C 8.x EnterpriseData exchange format or CommerceML 2).
- Analysis — Flexbooks scans the file and reports the record types found and their counts.
- Mapping — map the 1C accounts and fields to their Flexbooks equivalents, adjust the chart of accounts translation and the field rules, and if needed set the Cut-over date (Дата переходу) (see below). You can save the mapping profile and load it for the next session.
- Preview — review what will be created. Nothing in your data has changed so far.
- Run — start the import. Records are created in the working database at once, in dependency order (see below).
- Verification — review the reconciliation report of the data already written and click Approve migration.
At the Run step the result is shown for each record; Retry failed records retries the rows with errors.
What is written, and when
- Upload, Analysis, Mapping and Preview change nothing in your data: the file, the analysis, the mapping and the planned records stay in the migration session. You can go back on these steps. Preview shows the plan from the export; it does not compare it with what Flexbooks already holds.
- Run writes straight into the working database; there is no separate trial copy. New catalog entries are created, and an existing entry with the same code is updated: the export overwrites its name and the fields 1C carries. Documents are created and posted, so entries and registers appear at once. Each record is saved on its own: a record that fails does not undo those already written. You cannot go back from this step.
- Approve migration only completes the session. It writes nothing more and undoes nothing, and you cannot use it to reject what was written.
A run cannot be undone automatically. Documents are unposted and marked for deletion one by one, and catalogs are corrected by hand. So back up the database before a run on real data, or try the export on a separate copy first. Running the same export again creates no duplicate documents.
What is transferred
Records are imported in this order so that dependencies resolve correctly — catalogs first, then documents in date order:
- Currencies, units of measure, banks, chart of accounts
- Organizations, individuals, divisions, warehouses, employees, cost items and cash-flow items, price types
- Items, counterparties, contracts, bank accounts, cash desks, fixed assets (with their parameters)
- Accounting policy and item accounts (information registers)
- Opening balances by section — settlements by counterparty, contract and document, goods by item and warehouse with quantity, fixed assets with parameters, payroll by employee, VAT by first event
- "As is" history (see below), then documents: receipts and sales with the operation type, returns, tax invoices and VAT adjustments, cash orders, advance reports, warehouse and fixed asset documents, payroll accruals, manual operations, prices, payments and bank statements
Flexbooks posts the documents itself, with all its checks. For sales invoices that do not give a
revenue account on the line, the migration uses 702 (goods) or 703 (services); for receipts,
281 (goods) and 92 (services).
"As is" history and the cut-over date
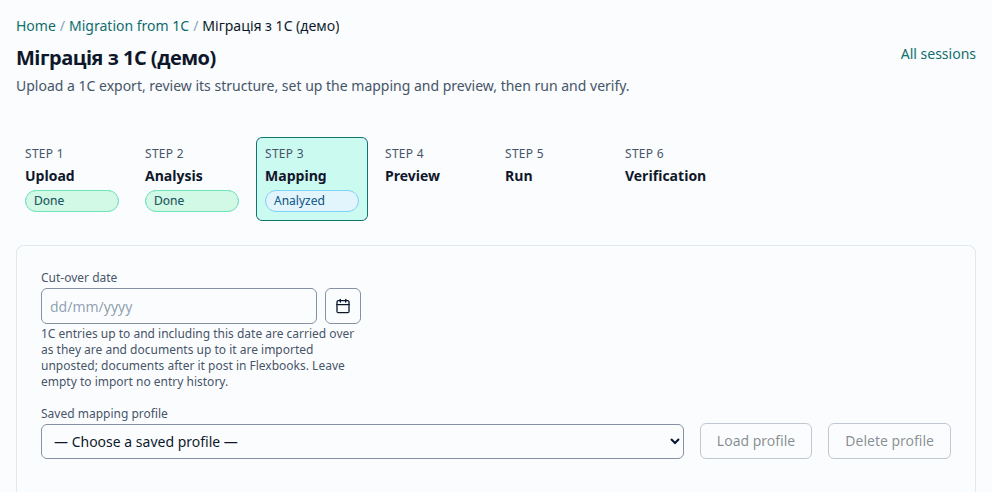
The Cut-over date field on the Mapping step accepts a date in the dd/mm/yyyy format (with any other value you cannot proceed); an empty field means the entry history is not transferred. If the date is set, the 1C entries up to and including that date are transferred as is: one manual operation per 1C document, with accounts and analytics mapped by the profile (the BAS template). The 1C documents of this period are transferred unposted; documents after the cut-over date are posted normally. An entry the accounting does not accept is not transferred — the migration record names the rule it breaks — and no 1C entry after the cut-over date is transferred.
Reconciliation and sign-off
The Verification step compares the transferred balances with the source: by account and by the trial balance by analytics at the cut-over date (or the balances date) — each account by the analytics 1C keeps it by (counterparty and contract, item and warehouse, employee and so on). A difference leads to the counterparty, contract or item it concerns, and to the documents that make up the balance in Flexbooks. If the trial balance matches the 1C export within the tolerance, the migration can be approved at once. If there are differences or records with errors, approval is possible only with the checkbox "I have reviewed the differences and still agree to approve this migration.", and this is recorded. The Verification step is not pictured here: the demo keeps a session with the sample export analyzed only, and the reconciliation report appears after a run.
Approval completes the session and does not undo what was written; investigate the differences before it.
Proforma invoices are deliberately excluded, and bank statements are imported as drafts (the accounting comes from the transferred payments) rather than posted.